Renovating your own kitchen is one of the most rewarding projects a homeowner can take on — especially when you balance creativity with careful planning. More homeowners today are stepping into the role of owner-builder, managing trades and design choices themselves to create personalized, high-end kitchens. This guide from Current Electrical Contractors covers the most important things you need to know about electrical for DIY kitchen remodels — from planning and safety tips to modern lighting ideas — so you can build a kitchen that’s beautiful, functional, and powered with care.
🏡 Why More Homeowners Are Tackling Luxury Kitchen Renovations Themselves
Kitchen remodels continue to top the list of home improvement projects — and for good reason. The kitchen is the heart of the home, a daily workspace, and one of the best-value upgrades a homeowner can make.
Recent data shows that bathroom and kitchen remodels remain the most popular renovation projects, with nearly 9 in 10 homeowners (89%) hiring at least one professional during their renovation. Interestingly, while most homeowners bring in help, more people than ever are taking a hands-on approach — coordinating trades, sourcing materials, and even doing some of the work themselves.
🔧 The Motivation Behind DIY & Owner-Builder Kitchen Projects
Not every homeowner wants to hand over their dream kitchen to a general contractor.
1. Control Over the Outcome
Many owner-builders want to be directly involved in design decisions and timelines. Managing the project themselves gives them the freedom to choose trades, materials, and finishes — and to ensure every detail meets their expectations.
2. Saving Money Without Sacrificing Quality
While it would be ideal to have tens of thousands of dollars to hand over for a turnkey renovation, that simply isn’t possible for everyone. Acting as your own project manager can save a significant portion of total costs — money that can instead go toward better cabinetry, lighting, or appliances.
3. Personal Satisfaction & Skill
Some homeowners genuinely enjoy the process. They have the time, organizational skill, or hands-on ability to handle tasks like demolition, painting, or even basic carpentry — while hiring professionals for the technical and code-critical work.
🍳 What a Kitchen Remodel Typically Encompasses
A full kitchen remodel involves much more than new cabinets and countertops. Common elements include:
- Layout and space planning: moving walls, changing flow, or opening the kitchen to other rooms.
- Cabinetry and storage: custom vs. modular, built-ins, and specialty inserts.
- Appliances: new layouts may require additional wiring or gas lines.
- Countertops and backsplashes: stone, tile, or composite selections that may affect outlet placement.
- Lighting design: overhead fixtures, under-cabinet strips, pendants, and accent lighting.
- Flooring and finishes: hardwood, tile, or vinyl — which can affect transition height and appliance clearances.
- Plumbing and electrical systems: bringing older wiring or pipes up to code, adding circuits, or relocating services.
Even “simple” remodels often touch 3–4 trades — cabinetry, electrical, plumbing, and finishes — which is why owner-builders benefit from thoughtful planning and collaboration.
🏗️ Planning & Design: Setting the Stage for a Smooth Kitchen Remodel
Every great kitchen renovation starts long before demolition day. Careful planning can mean the difference between a seamless transformation and months of stress or costly rework. Here’s how to set yourself up for success.
1. Set a Realistic Budget
Before you start shopping for cabinets or tiles, decide what you can comfortably spend.
Always include a 10–20% contingency fund for surprises — older wiring, hidden water damage, or layout changes can quickly add up.
💡 Tip: Create separate budget categories — cabinetry, countertops, flooring, lighting, electrical, appliances, plumbing, and labor — to make tracking easier and decisions clearer.
2. Gather Inspiration & Define Your Vision
Collect ideas from design sites, showrooms, and magazines. Identify your must-haves (like concealed outlets or a double oven) versus your nice-to-haves.
This will guide your layout and ensure your design choices fit your lifestyle — whether that’s a chef-style workspace, a family hub, or a clean minimalist kitchen.
3. Develop Layout Drawings
Your layout determines how everything fits together — not just visually, but functionally.
- Start by mapping your current kitchen layout. Mark visible outlet locations, light fixtures, and plumbing lines.
- Draft your future layout with accurate dimensions.
- Plan your work triangle — sink, stove, refrigerator — for efficiency.
- Ensure there’s adequate clearance for appliance doors and foot traffic.
- If you’re moving walls, plumbing, or electrical, review feasibility early with a professional.
⚡ Electrical Pro Tip: Once you’ve selected your contractors, your sketches help your electrician and plumber give more accurate input — and prevent surprises once walls are open or custom cabinets are ordered.
4. Select Appliances Early
Appliances drive both design and electrical requirements.
- Choose your appliances early so circuit loads, outlet placements, and clearances can be planned precisely.
- Revisit your layout if your selections change — a wider refrigerator or wall oven can shift cabinet spacing and wiring runs.
⚡ Electrical Pro Tip: Early appliance selection allows your electrician to plan circuits and outlets correctly for power, voltage, and placement — avoiding expensive mid-project changes once drywall is up.
5. Decide What You’ll DIY and What to Contract Out
Owner-builders can often handle design, demolition, or painting — but electrical and plumbing should always be done by licensed professionals.
These systems are your kitchen’s lifelines. Mistakes here can lead to costly damage or serious safety hazards. A professional electrician will:
- Pull the required electrical permit.
- Design an electrical layout based on appliance and lighting loads.
- Verify what support is needed to hang your chosen fixtures. Tip: Your electrician will need to know the weight of the full fixture and the diameter of the canopy for the lighting fixtures.
- Discuss solutions to meet your design goals.
- Help with electrical demo if needed and complete both rough-in and trim-out phases safely and cleanly.
- Ensure all work meets local codes and passes inspection.
⚡ Electrical Pro Tip: During design, your electrician can help you find solutions that align with your goals. In some cases, your current electrical panel may not support all the new appliances or lighting you’ve planned — we may recommend a panel upgrade or a sub-panel to handle the extra load safely. We can also help fine-tune outlet and lighting locations to meet code while preserving your design aesthetic — for example, with under-cabinet outlets, pop-up power modules, or smart lighting layouts.
💬 Think of it this way: you can DIY the finishes — let a pro handle the current.
6. Choose and Pre-Order Materials
Before construction begins, finalize your finishes and fixtures — cabinets, flooring, tile, lighting, hardware, and paint.
- Lead times: Cabinets and specialty lighting often take 6–12 weeks.
- Batch consistency: Ordering early ensures color and finish match.
- Scheduling: Having materials on site keeps your trades moving and avoids costly downtime.
⚡ Electrical Pro Insight: Lighting fixtures are usually owner-supplied, while outlets, switches, light fixture mounts, and wiring fall under the electrician’s scope. Choose fixtures early — different lights can require different mounting supports or electrical boxes.
7. Select Contractors & Apply for Permits
Gather quotes from licensed electricians, plumbers, and other specialists.
As an owner-builder, plan the sequence: rough-in trades first, finish trades later.
Pull all required permits before work starts — inspections protect your safety and your home’s value.
⚡ Electrical Pro Insight: Your electrician will pull the electrical permit — make sure it’s in place before wiring begins.
8. Set Up a Temporary Kitchen
If you have a second kitchen — great! If not, create a small makeshift prep area with a microwave, toaster oven, and coffee maker to get through the renovation.
Plan for temporary water access (bathroom sink or laundry tub) and keep essential dishes handy.
A little organization here can make weeks of construction far more comfortable.
🔨 Construction Phase: The Big Steps
Demolition
Remove old cabinets, flooring, and sometimes even walls. Turn off water and power safely before starting.
If you’re doing demo yourself, know where wiring and plumbing lines are — accidents here can be costly.
⚡ Electrical Pro Tip: Before demolition, your electrician can disconnect live wiring, remove old circuits, and make the area safe to work in. This small step helps prevent electrical hazards and protects both workers and your home’s systems.
Rough-In Work
This is where your electrician and plumber run wires and pipes behind walls.
It’s the backbone stage — invisible later, but essential for safety and function.
Once rough-in is inspected and approved, walls can be closed.
⚡ Electrical Pro Tip: The order of work between electrical and plumbing doesn’t matter much, but avoid having both trades working simultaneously. Coordinating their schedules keeps things moving smoothly and prevents costly rework.
Framing & Drywall
Walls are repaired, patched, and prepped for finishing.
⚡ Electrical Pro Tip: Before closing them up, double-check outlet heights, switch box placements, and lighting rough-ins to make sure they match your layout drawings.
Flooring & Backsplash
Usually installed before cabinets, these create the visual foundation of your new space.
Make sure any floor height changes don’t interfere with appliance clearances or base cabinet fit.
Cabinets & Countertops
The “wow” phase begins. Cabinets are installed level and secured, then countertops are templated and fitted.
Electrical Trim-Out
Your electrician returns to install switches, outlets, and light fixtures.
This is where careful planning pays off — aligned outlets, smart dimmers, under-cabinet LEDs, and power modules bring both function and beauty together.
Once trim-out is complete, there’s typically a final electrical inspection. This ensures all devices are properly wired, circuits are labeled, and your system meets local safety codes. It’s also when the electrical permit is officially closed out, confirming that the work has passed all required inspections and is safe for long-term use.
Appliance Installation
Appliances are connected and systems tested for proper power supply and grounding.
Finishing Touches
Painting, trim work, hardware, and final cleanup.
Step back — your new kitchen is ready for its first meal.
💡 Amazing Electrical Ideas for a Modern Kitchen
Homeowner-builders can achieve stunning, professional-grade results by integrating thoughtful electrical features:
1. Layered Lighting Design
Combine ambient (recessed), task (under-cabinet), and accent (toe-kick, shelf) lighting. Put each on dimmers or smart controls for flexible scenes.

2. Hidden Power Solutions
Pop-up outlets in islands, under-cabinet power strips, or in-drawer charging stations maintain a clean look without sacrificing convenience.

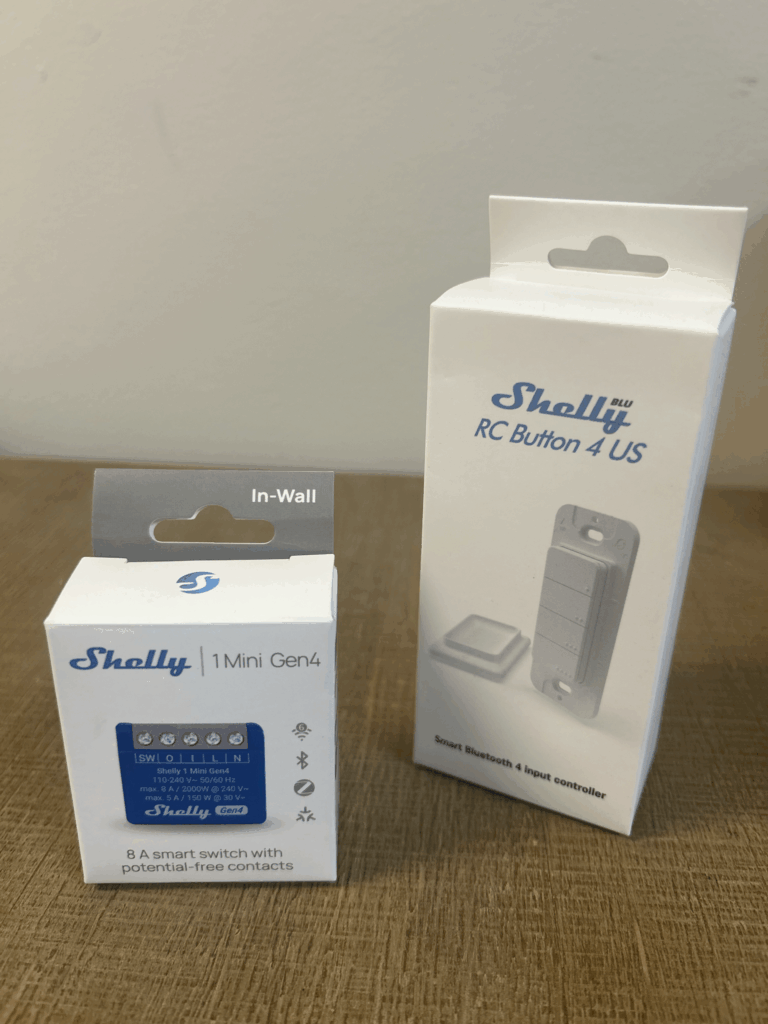
3. Smart Home Integration
Voice-controlled lighting or app-based dimmers. Smart switches are affordable and add real luxury.

💬 Final Thoughts from Albee—Partner Early, Build Beautifully
At Current Electrical Contractors, our goal is simple — Power With Care.
DIY and owner-builder kitchen renovations can be rewarding, affordable, and deeply personal — if they’re planned correctly.
The secret is collaboration: even if you’re managing trades yourself, bring your electrician into the design conversation early.
That one step can prevent the most common (and expensive) renovation headaches before they happen.
“Electricians don’t just make things work — they make great kitchens work beautifully.”
Whether you’re updating a classic space or creating a showpiece from scratch, we’d love to help you do it right from the start.
Contact Current Electrical Contractors to schedule a consultation.
Yours faithfully,
Your most favorite member of the team,
Albee Einstein 🐝⚡